Once a control area is defined (as explained in the Control Area section of the manual), the control mechanism (either priority-based or signal-based) can be set up. This section describes the procedure for setting up a priority control.
Priority control resembles a major-minor road setup, where streams are assigned higher or lower priorities at a junction. Streams with higher priority move through the junction while lower-priority streams wait. For simple cases, such as a highway entry ramp, the program manages waiting automatically. Priority control can be set up when specific flow conditions require it.
Priority control can be compared to a manual intervention, such as a police or warden directing traffic, where vehicles on low-priority streams wait until they are granted access. The overall procedure involves:
Detailed steps with screenshots are provided below.
Click on the Priority Ctrl button to open the editor. The editor has four input fields:
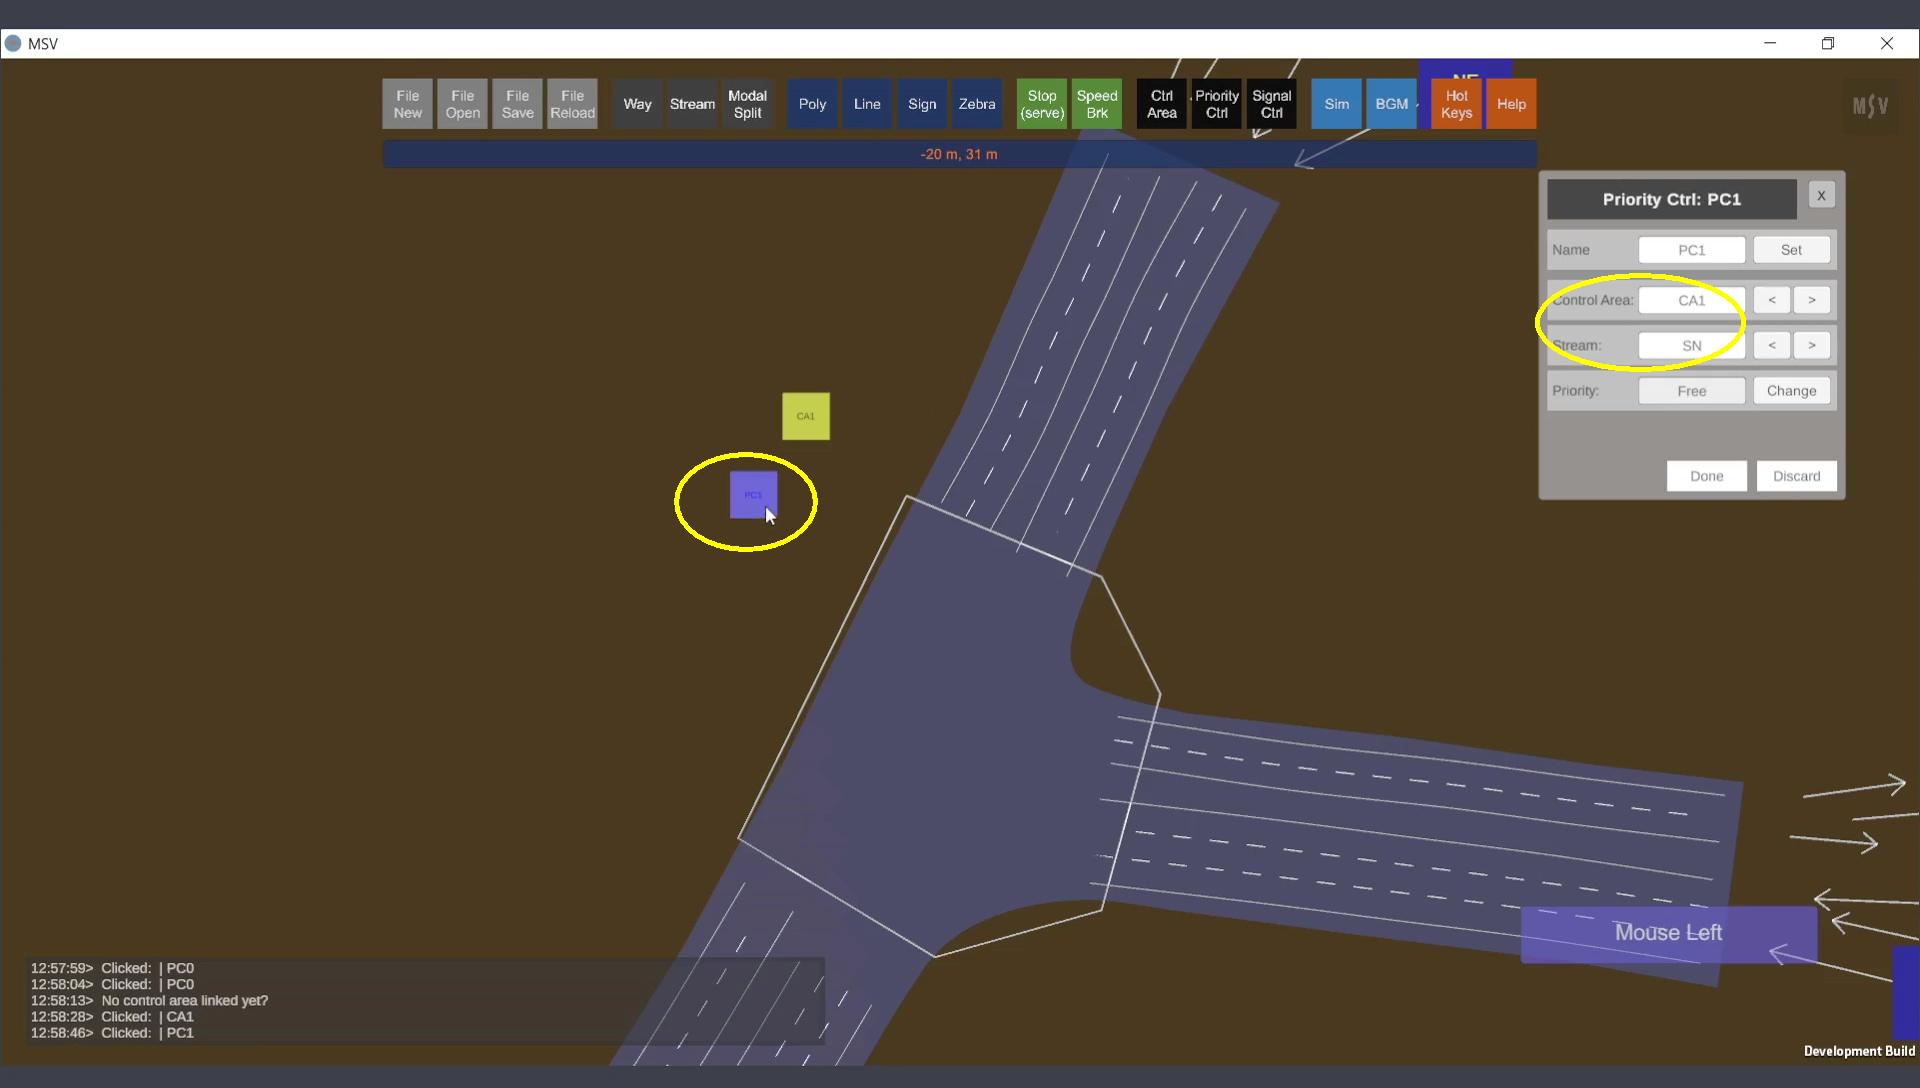
To create a priority control, use Ctrl + Click near the control area. This creates a quad representing the priority controller. Press Done to save it. The quad, bearing a default name, is the only shape associated with the priority control.
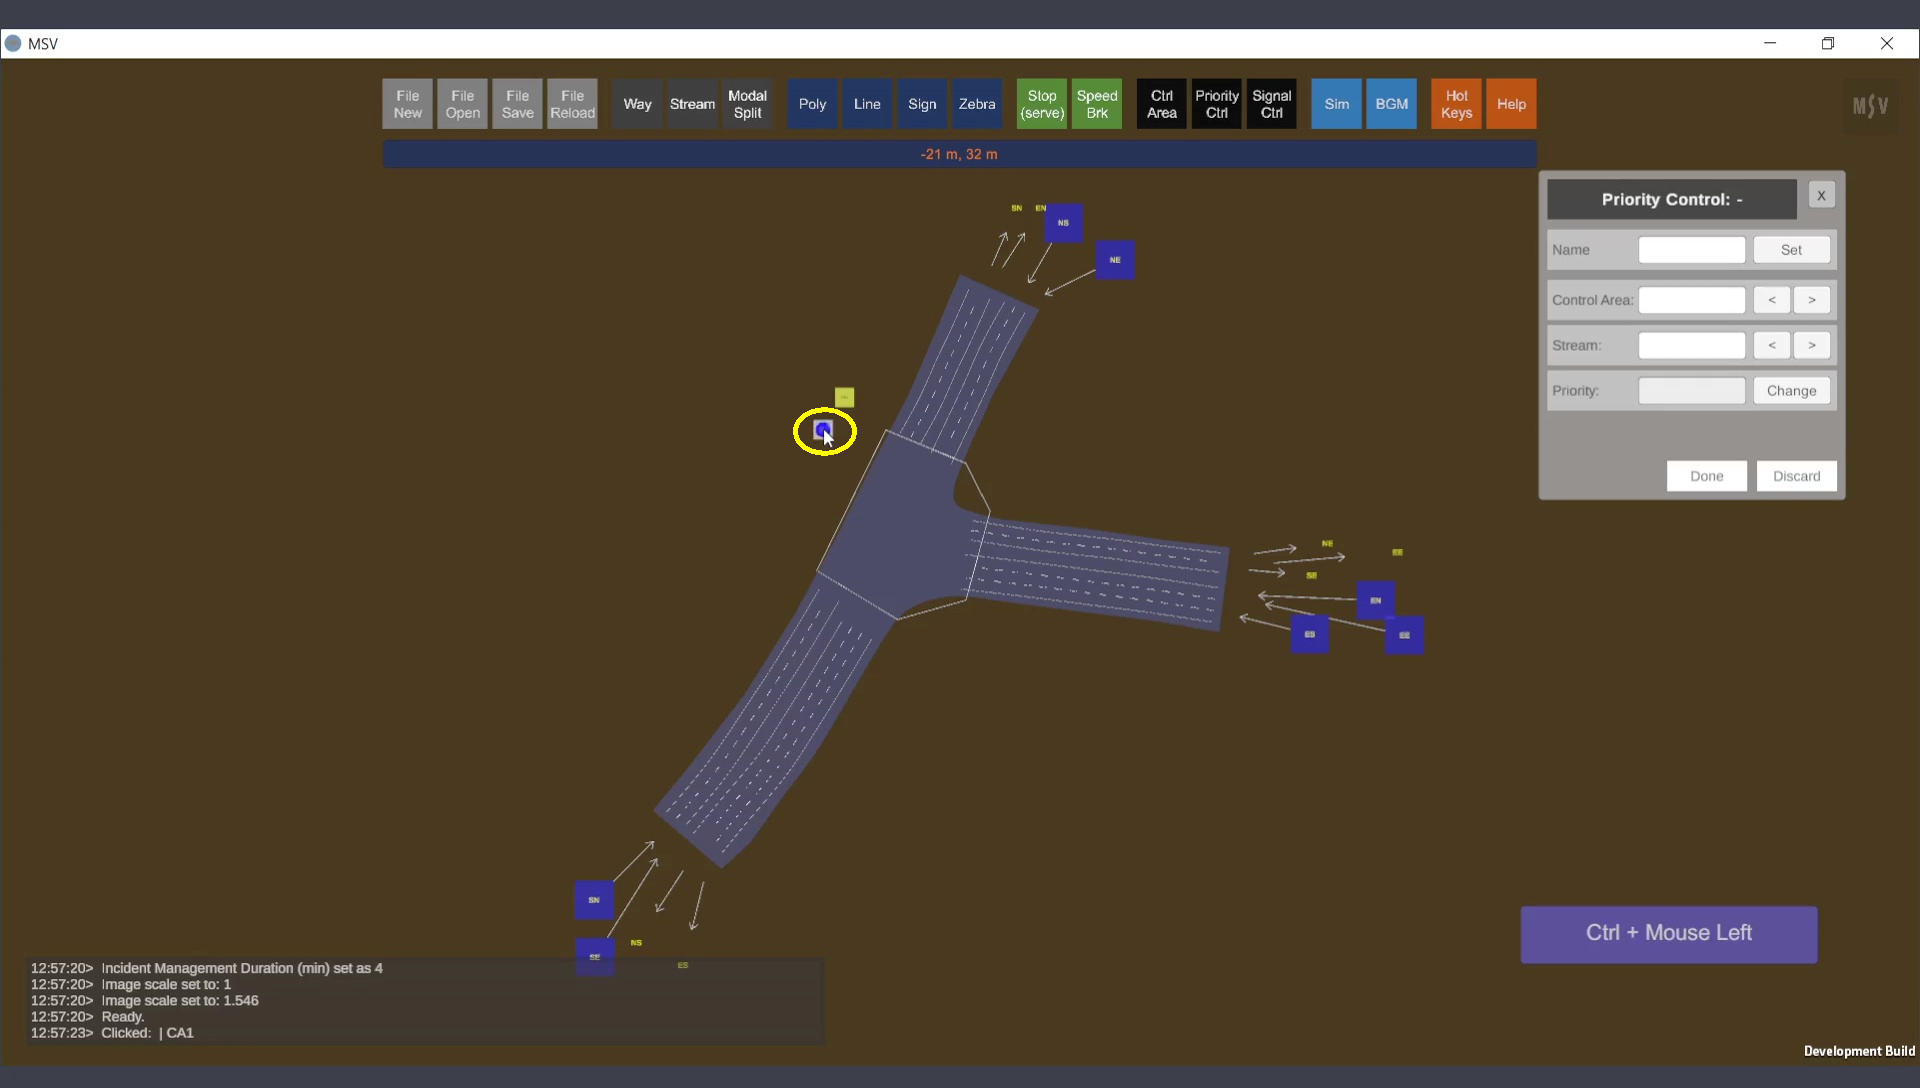
Priority Control Editor and Creation of a control.
You can rename the controller using the first field in the editor, as shown below:
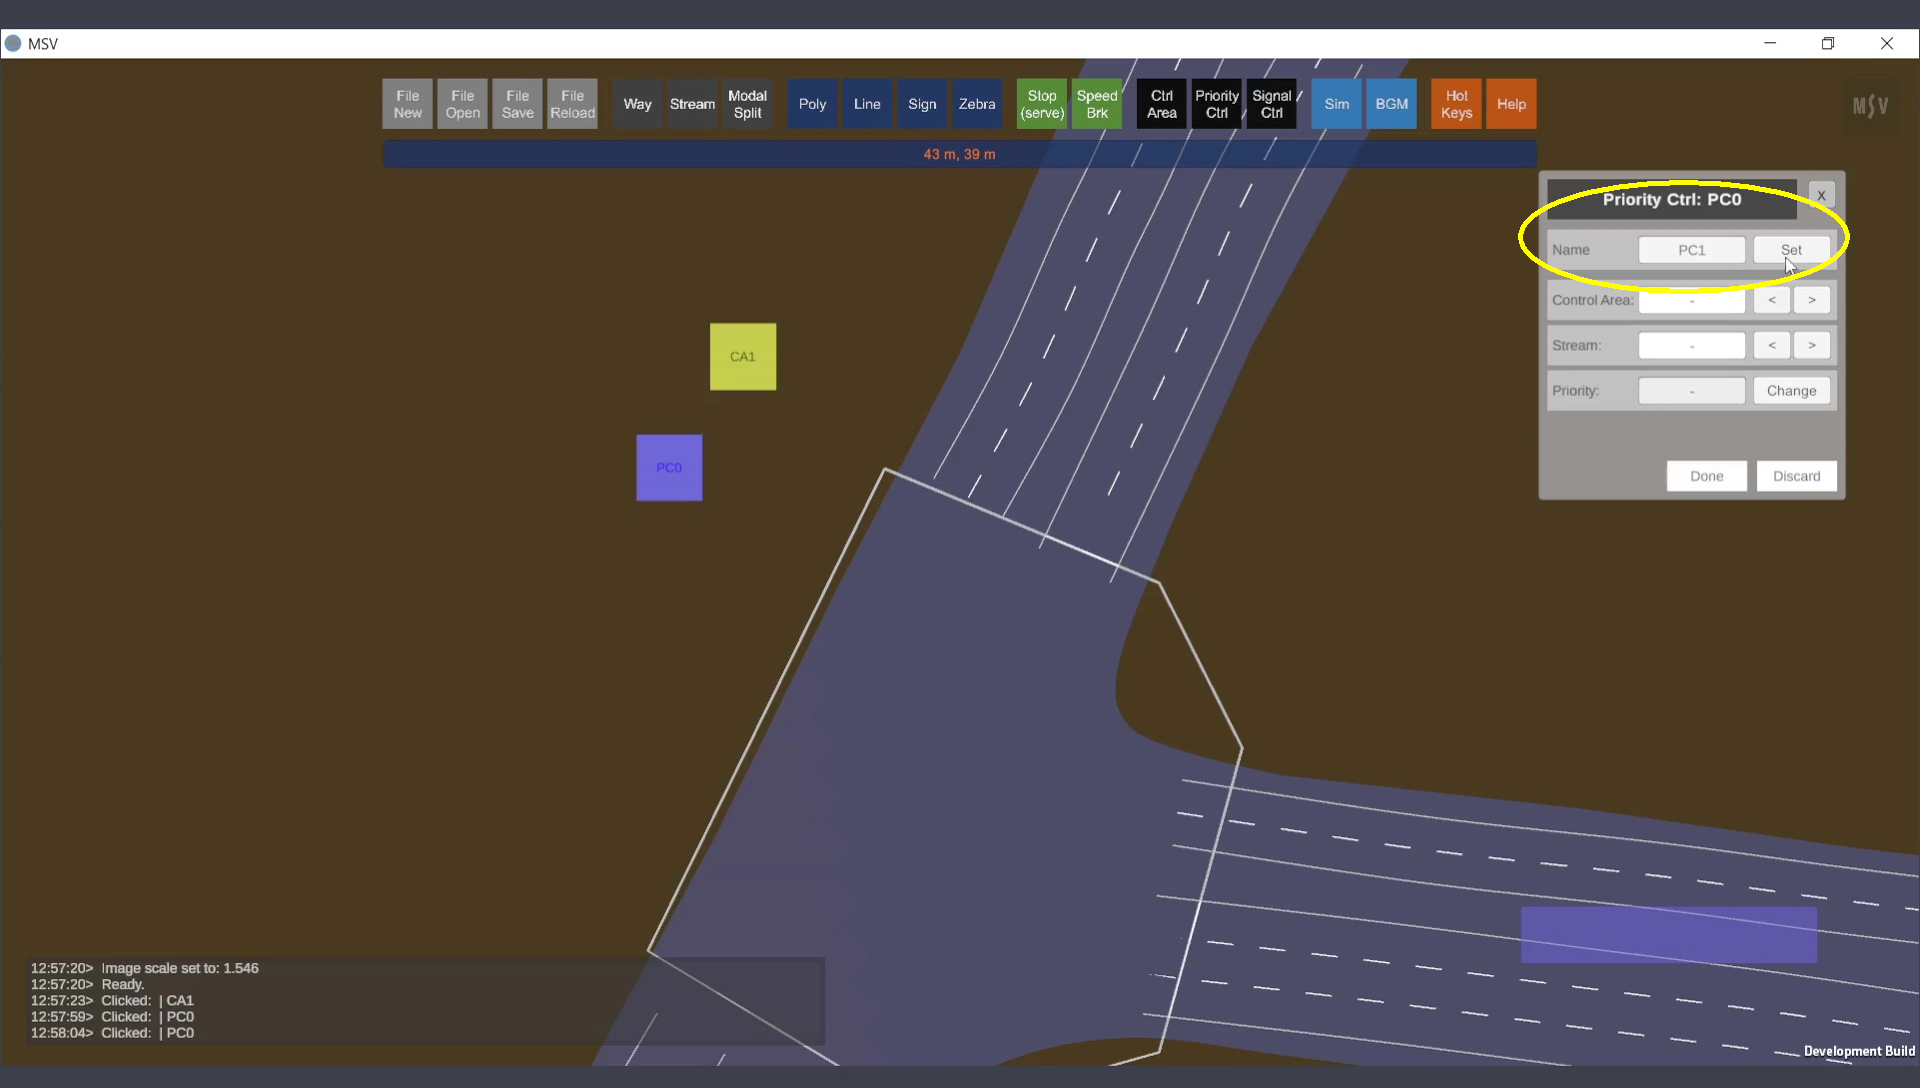
Setting a name for the controller.
Press Done and close the Priority Control editor. Open the Control Area editor by clicking on the Ctrl Area button. Click on the control area’s quad. By default, the editor shows the controller type as None.
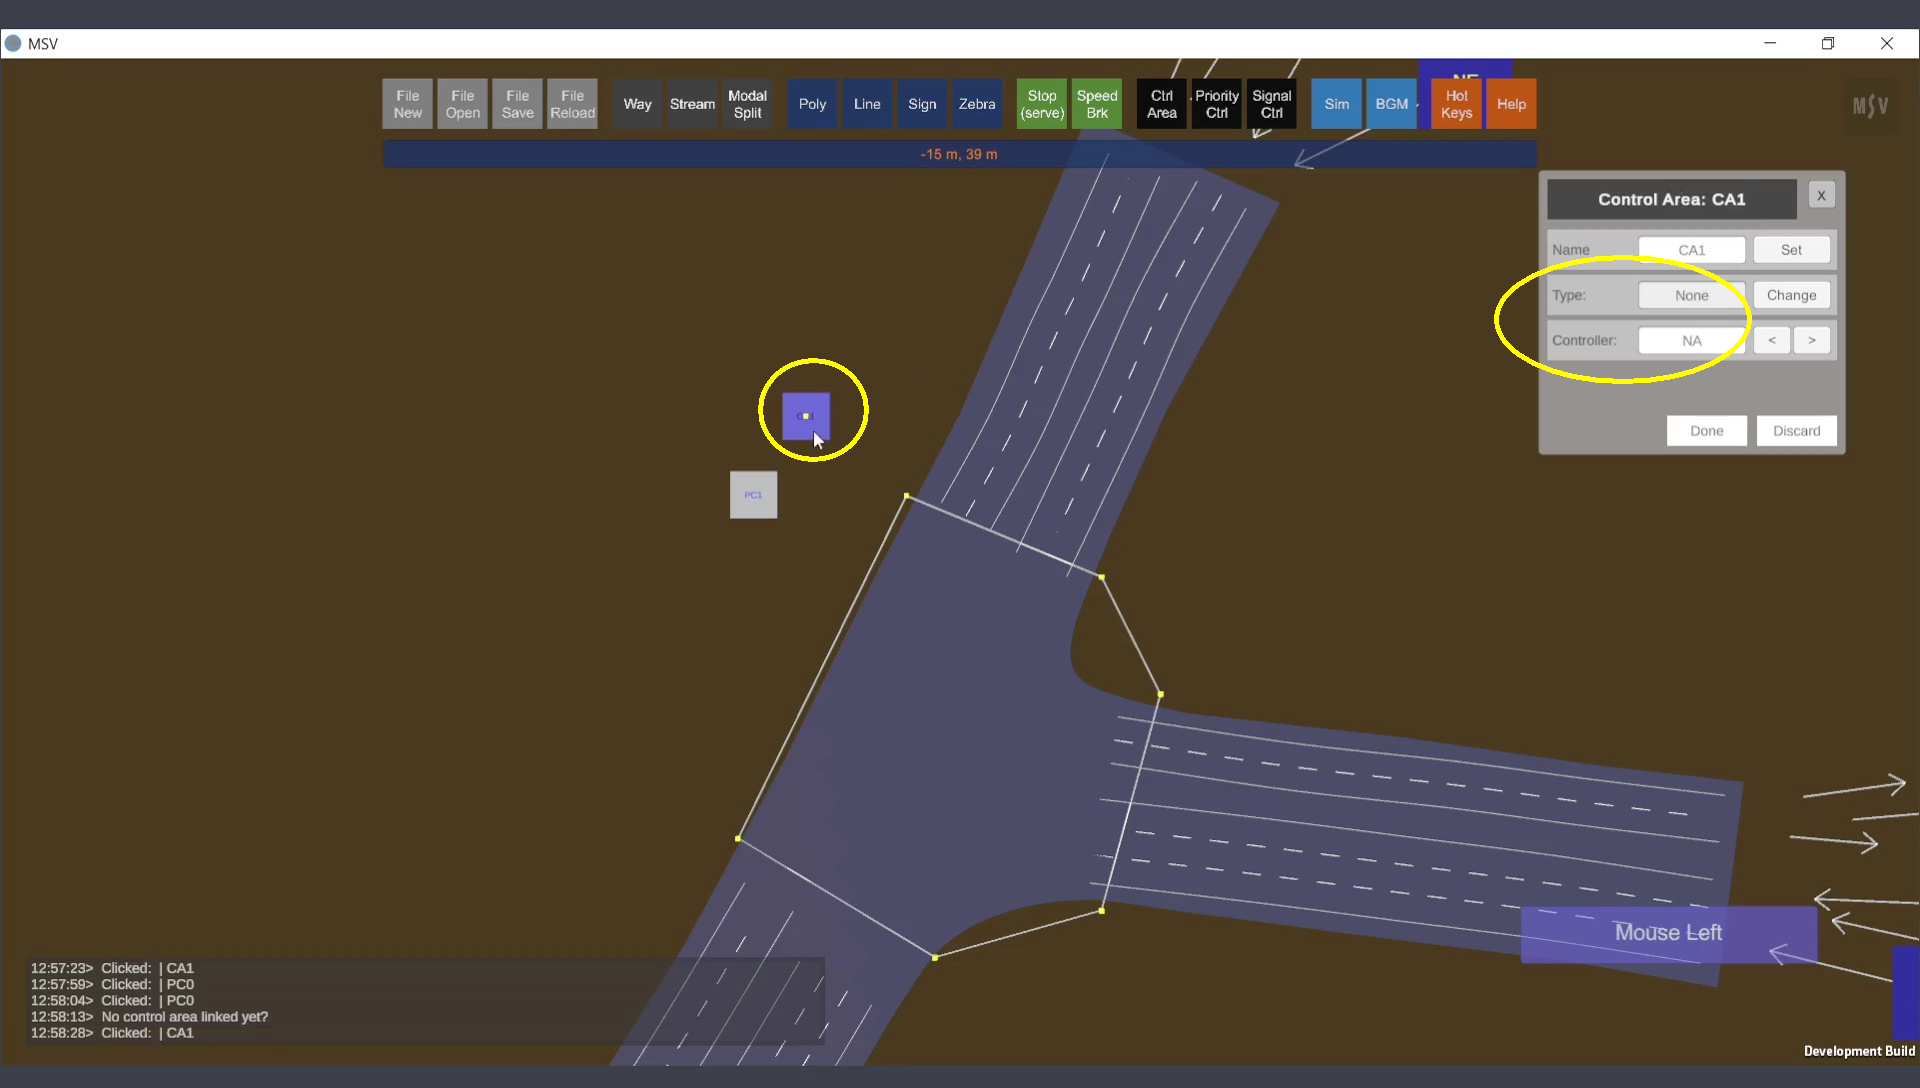
Default controller option in Control Area editor.
Change the controller type to Priority. The program lists available priority controllers. Select the desired controller, press Done, and close the editor.
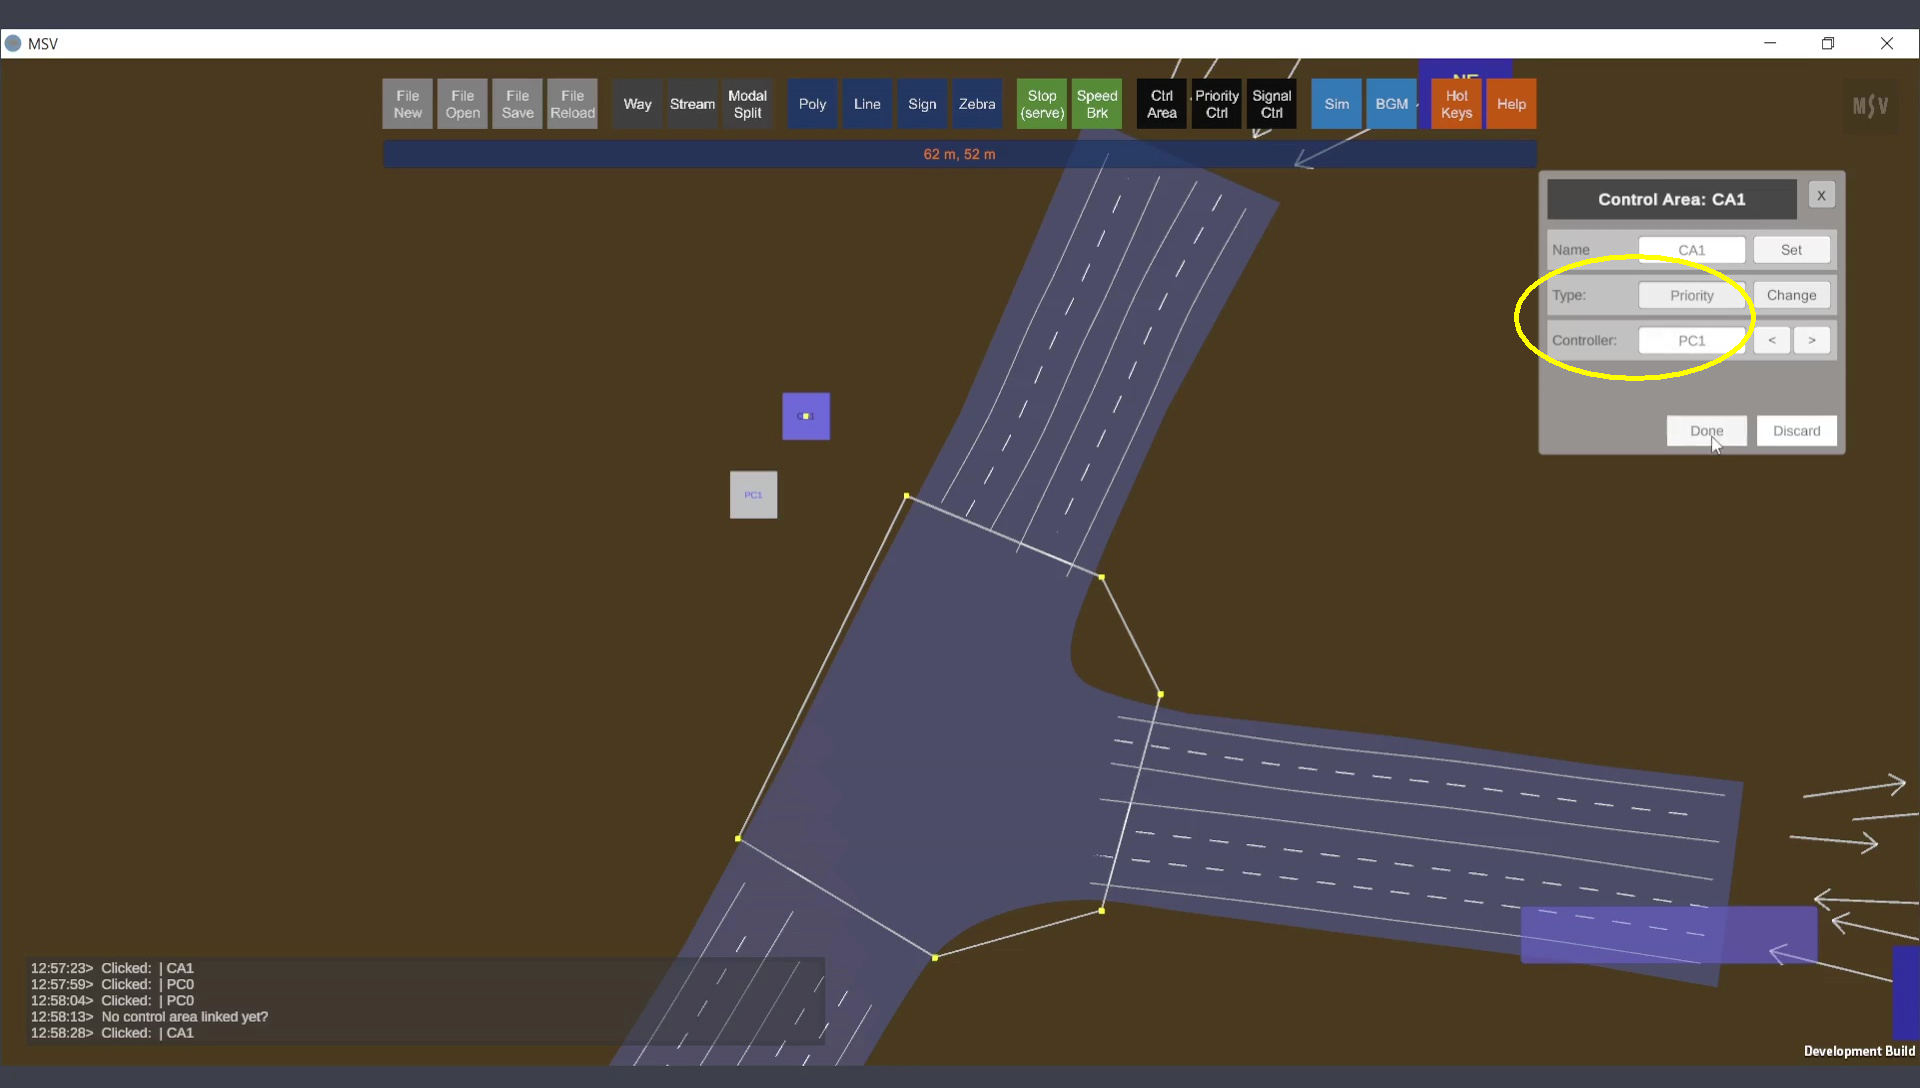
Linking Priority Controller to Control Area.
Open the Priority Control editor again and click on the priority control quad. The editor now displays the linked control area and the streams passing through it. Use the arrow buttons near the Stream field to choose a stream and set its priority as High, Low, or Free.
Priority controller showing linked control area and streams.
For this example, the north-south direction is considered a major road, and the east road is considered a minor road. Streams aligned with the north-south direction are assigned High priority, as shown below:
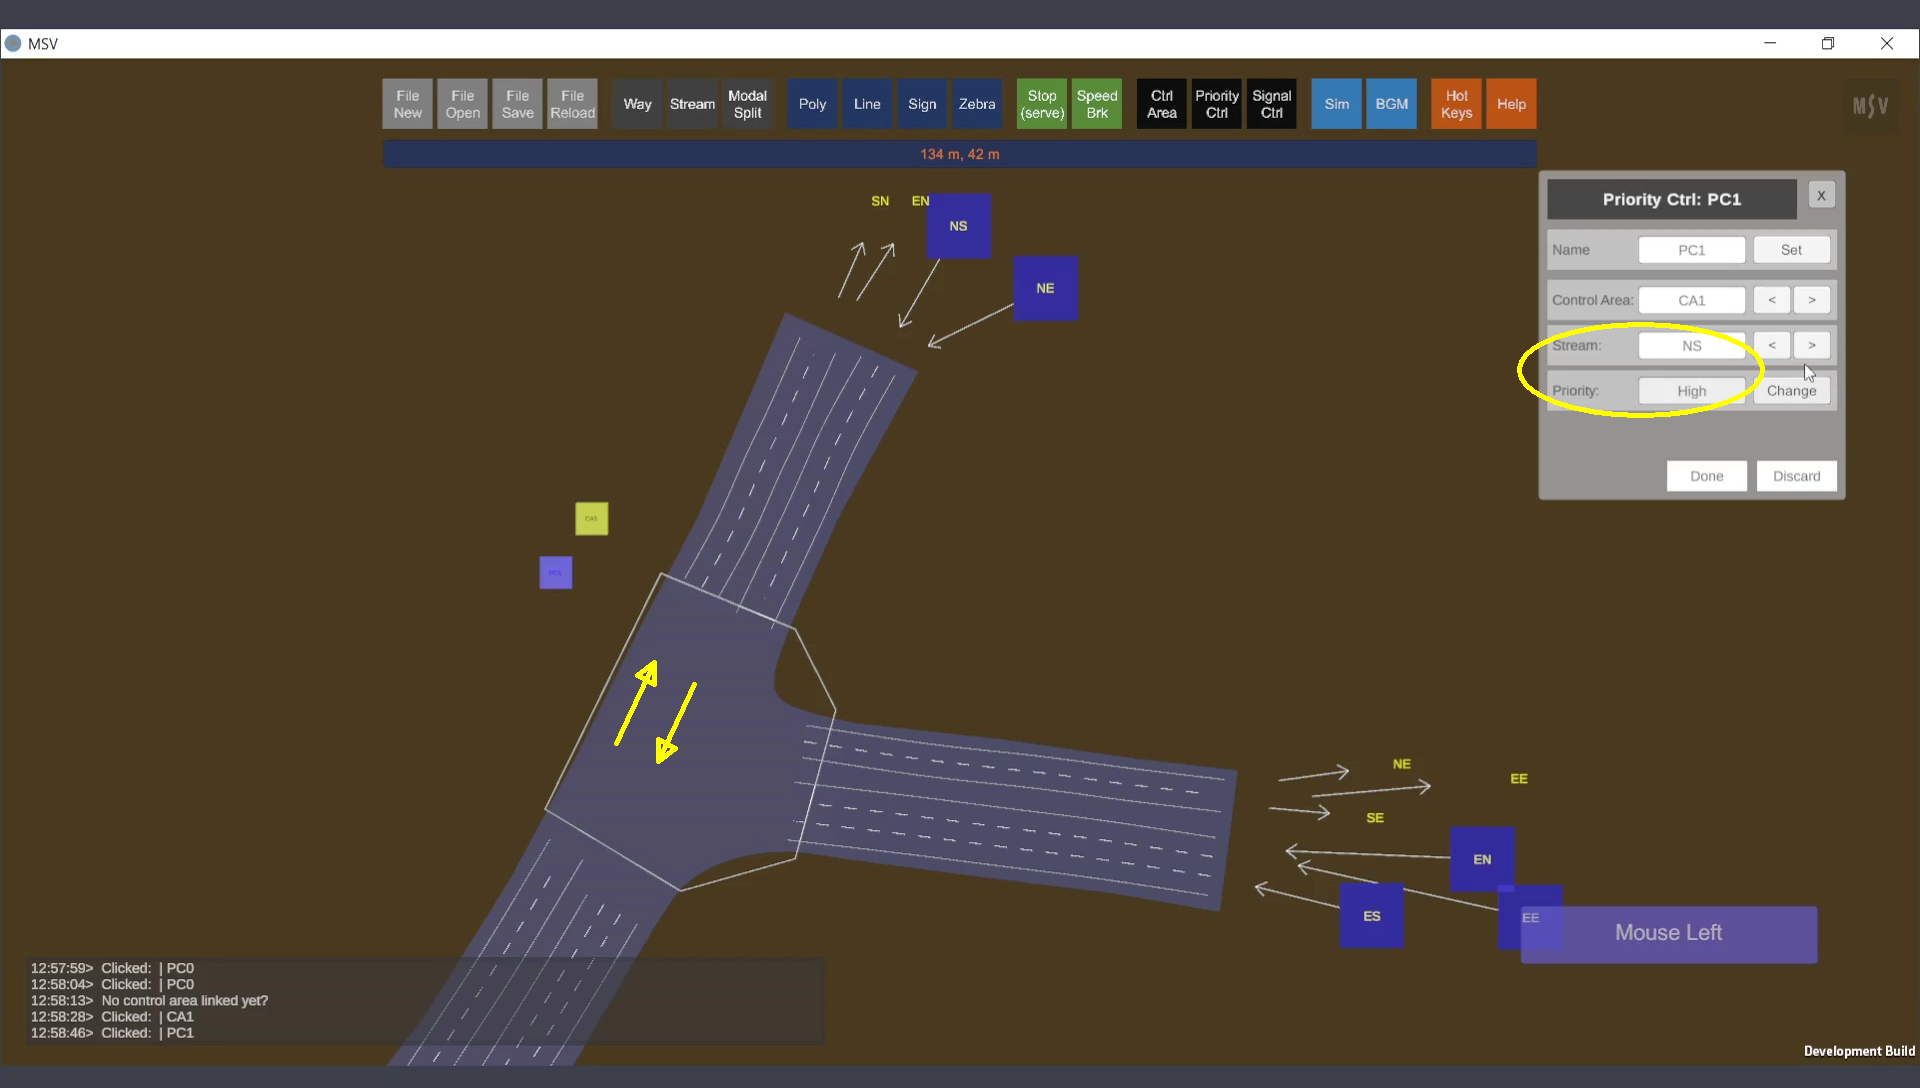
Setting high priority for a stream.
Streams originating from the east side (minor road) are assigned Low priority, as shown below:

Setting low priority for a stream.
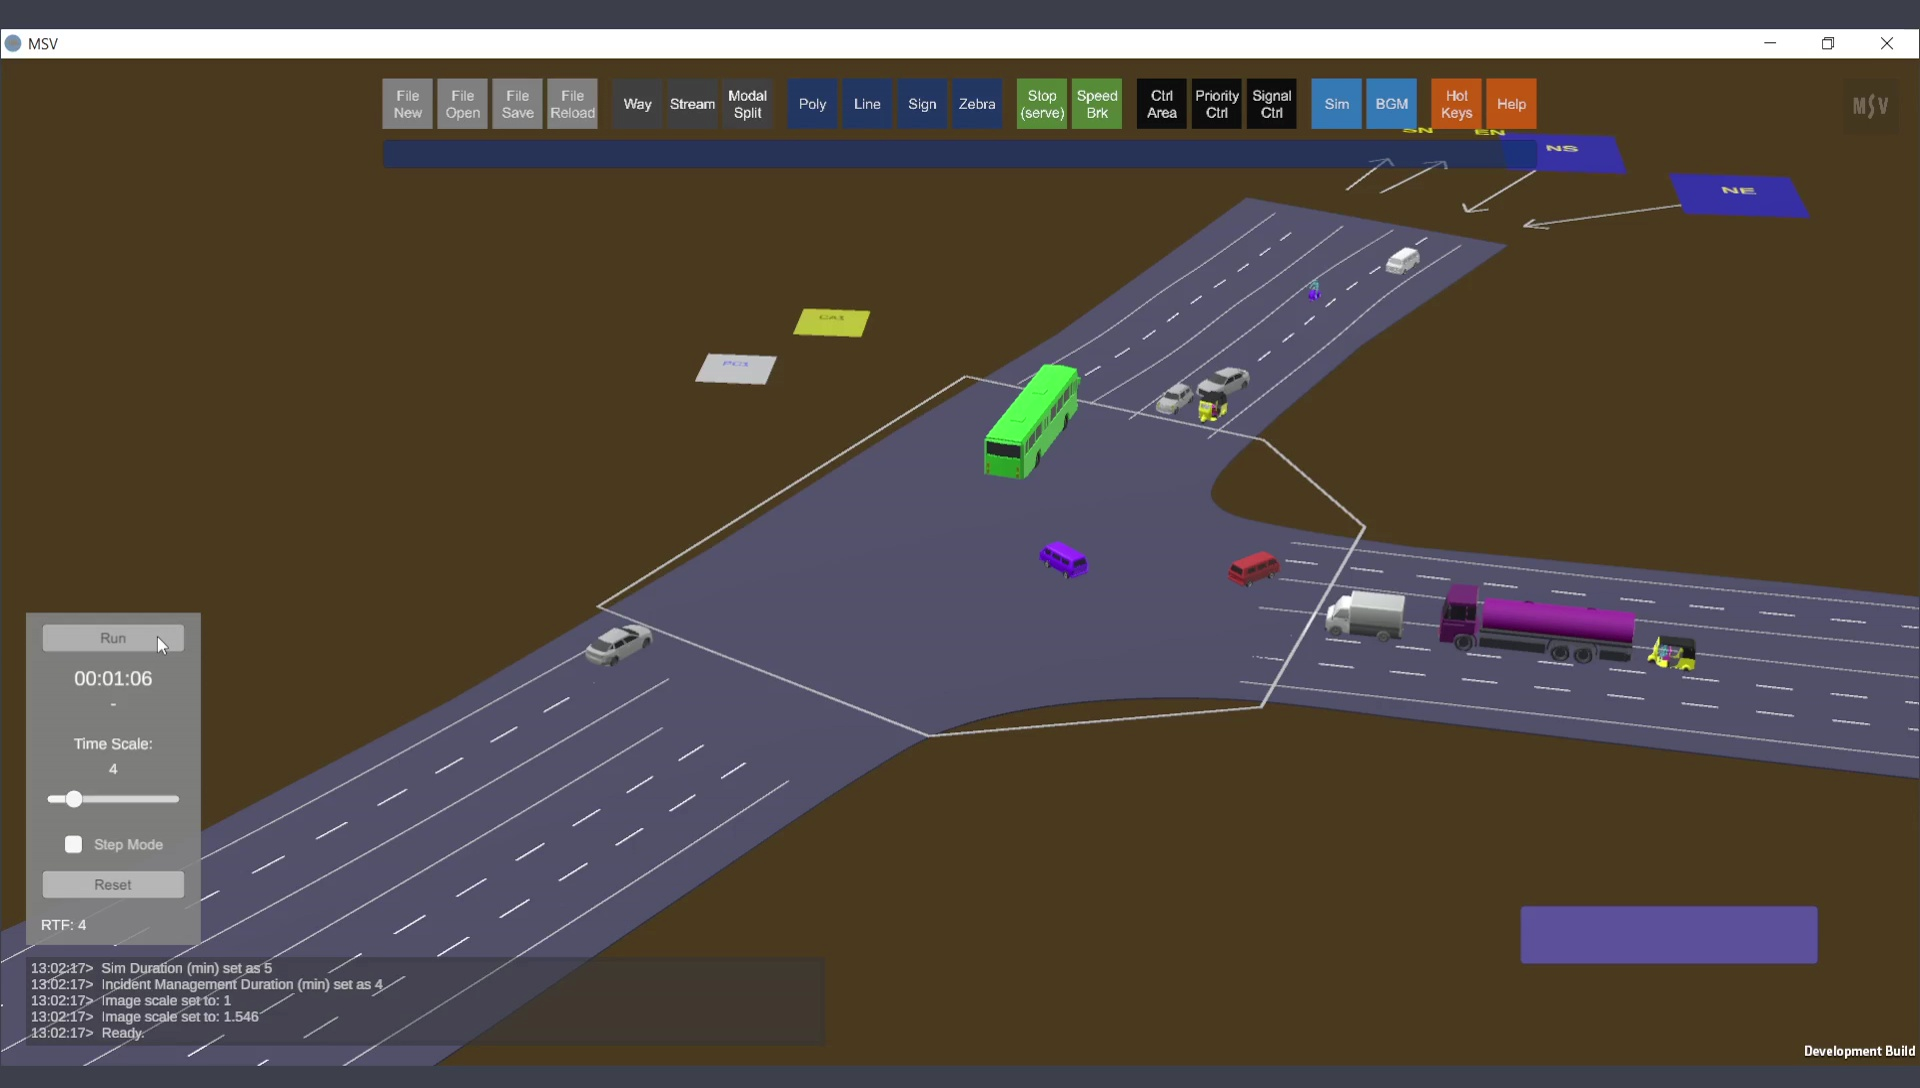
Once priorities are set for all streams, press Done and close the editor. Running the simulation will show vehicles on high-priority streams moving smoothly, while vehicles on low-priority streams wait, as demonstrated below:

Vehicles on high-priority streams moving; others waiting.
Vehicles on low-priority streams moving; others waiting.
Incidents occurred when south-east flow conflicted with north-south direction vehicles. This scenario demonstrated the need for a signal control instead of priority control. For this example, south-east flow was disabled to show priority control in action. The same junction works effectively under signal control with south-east flow enabled. For more details, refer to the Signal Control section of the manual.